What is SpyWarrior and why should you use it?
SpyWarrior, an anti-virus program based on a model that is yet to be used in the industry. The developed AI(artificial intelligence) algorithms automate malware detection and malware action categorization/inclusion in the malware database.
SpyWarrior provides thorough computer protection against all kinds of malicious threats. Whether your computer is infected with something less serious like adware, or if you’re dealing with malware, SpyWarrior will handle the threat accordingly and stop it from doing any damage. Among the threats SpyWarrior removes adware, browser hijackers, trojans, worms, scamware, viruses, malware, and ransomware. Its powerful scan engine and extensive database will ensure that all present threats are removed, and the real-time protection feature will prevent the threats from entering in the first place. The ransomware protection feature will also guard your files from becoming encrypted.
How to download SpyWarrior
Make sure you download SpyWarrior from a trustworthy source, such as the official www.spywarrior.com
Microsoft Edge
1. Click Download Now.
2. The download will appear on the right side. Click Save as to save the installer.exe file.
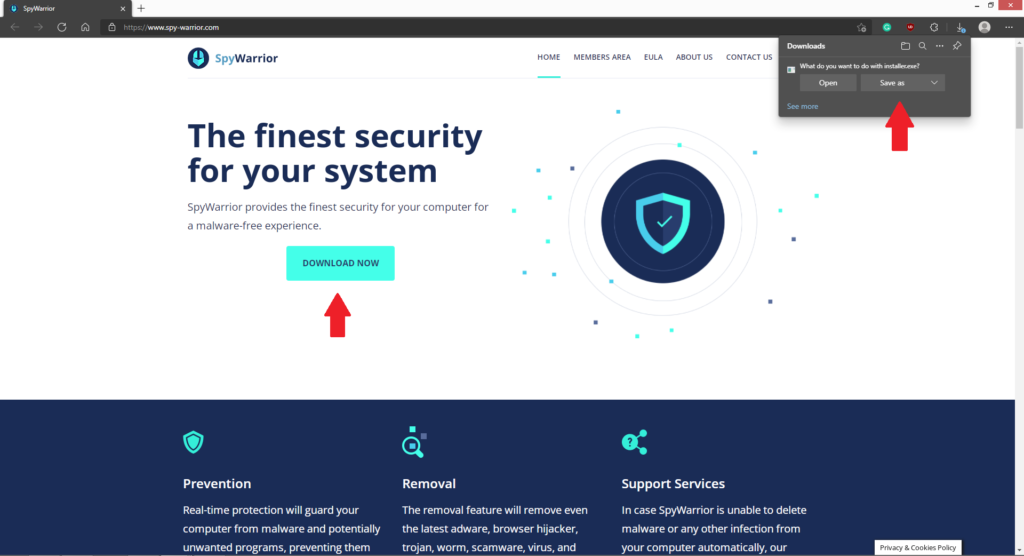
3. Proceed to the How to install SpyWarrior instructions.
Mozilla Firefox
1. Click Download Now, then Save File to save the installer.exe file.
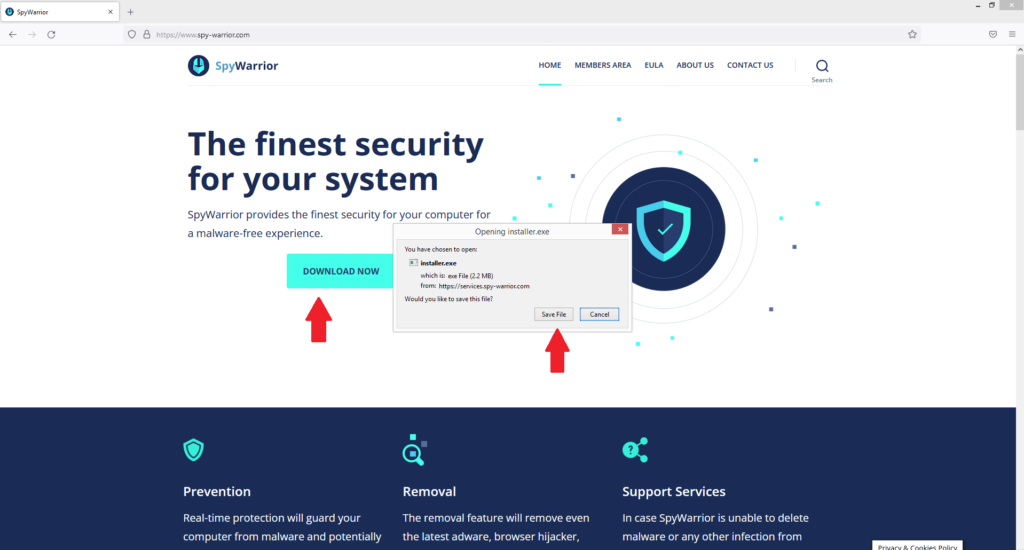
2. Proceed to the How to install SpyWarrior instructions.
Google Chrome
1. Click Download Now.
2. Save the installer.exe file.
3. Proceed to the How to install SpyWarrior instructions.
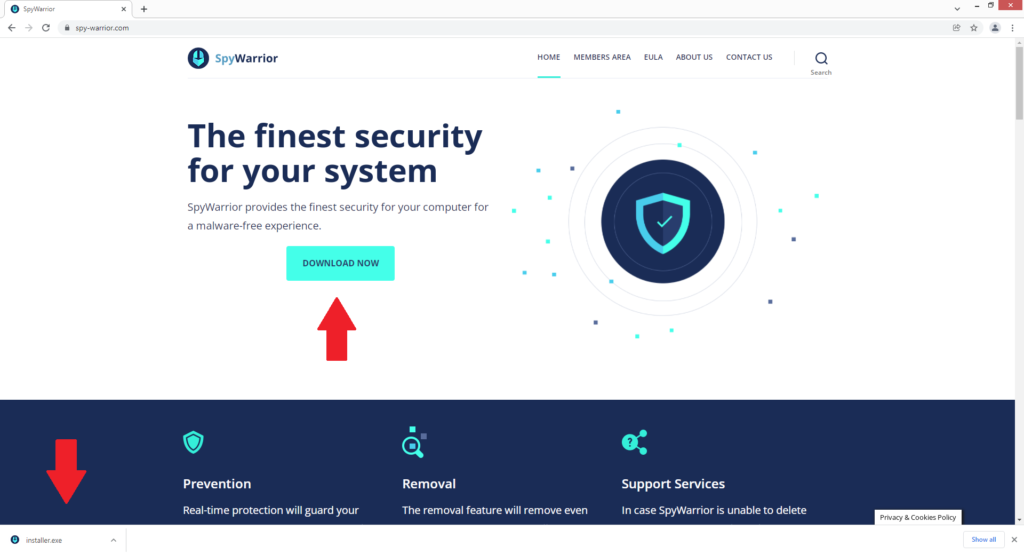
How to install SpyWarrior
1. Launch the spywarrior-installer.exe file to initiate the installation.
2. Click Yes in the User Account Control window that says “Do you want to allow the following program to make changes to this computer?”.
3. Select your language and click Next.
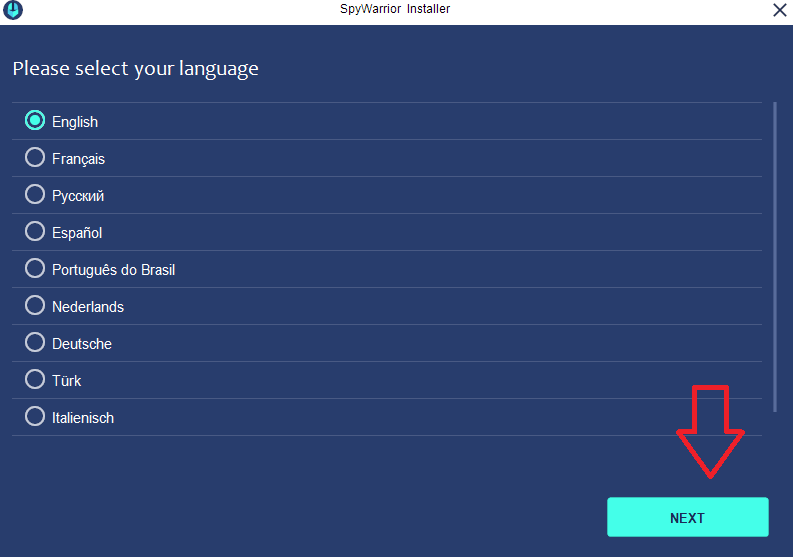
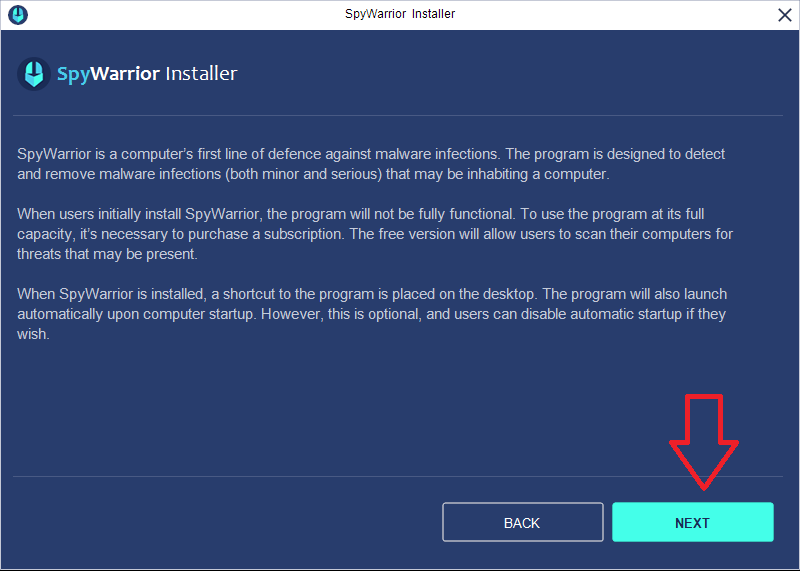
4. Carefully read the provided information and click Next.
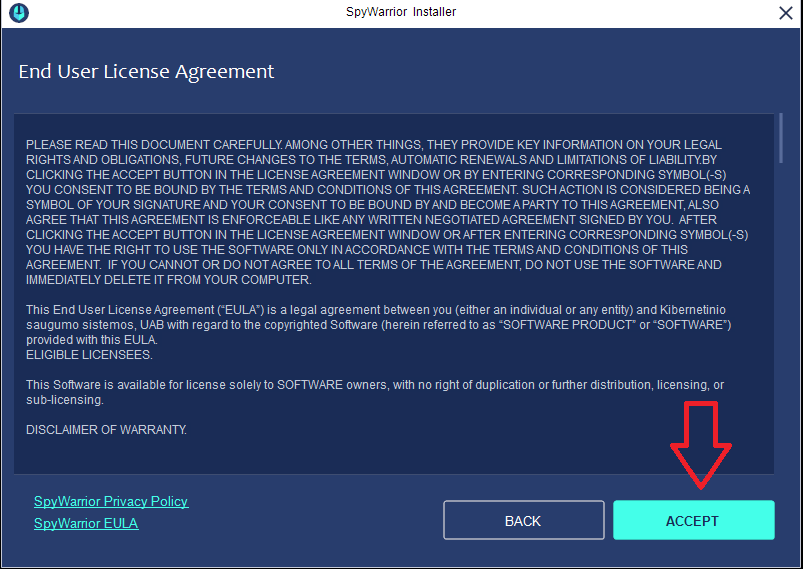
5. Read the End User License Agreement and click Accept.
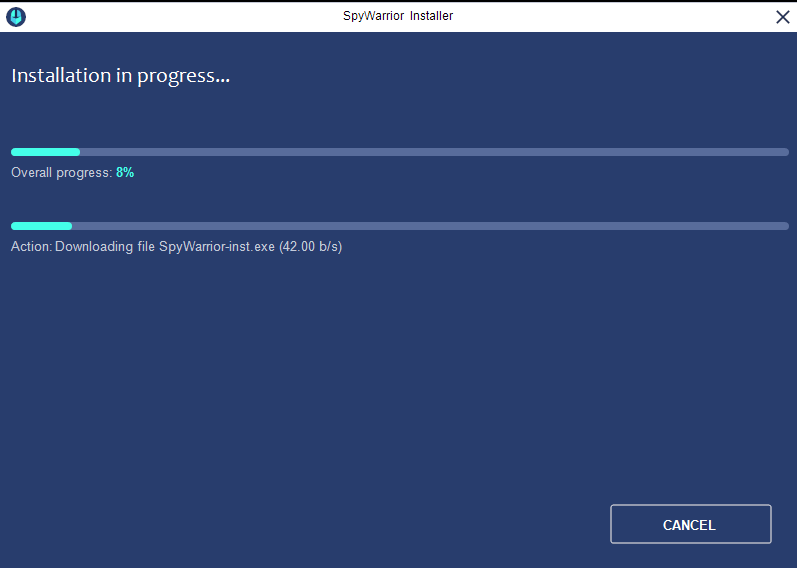
6. Wait for SpyWarrior to install. The program will launch immediately after the installation is complete.
How to use SpyWarrior?
SpyWarrior has been designed with simplicity in mind to make it easier for users to use it. As soon as SpyWarrior finishes installing, you can start using it.
- Launching a scan
You can launch a scan directly from the Dashboard by clicking “Scan Now”. In the Dashboard, you will also find information about your previous scans.

In the Scan section of the program, you can select what kind of scan you want to perform. If you click “Start Regular Scan”, the program will scan all locations that malware is usually found in.

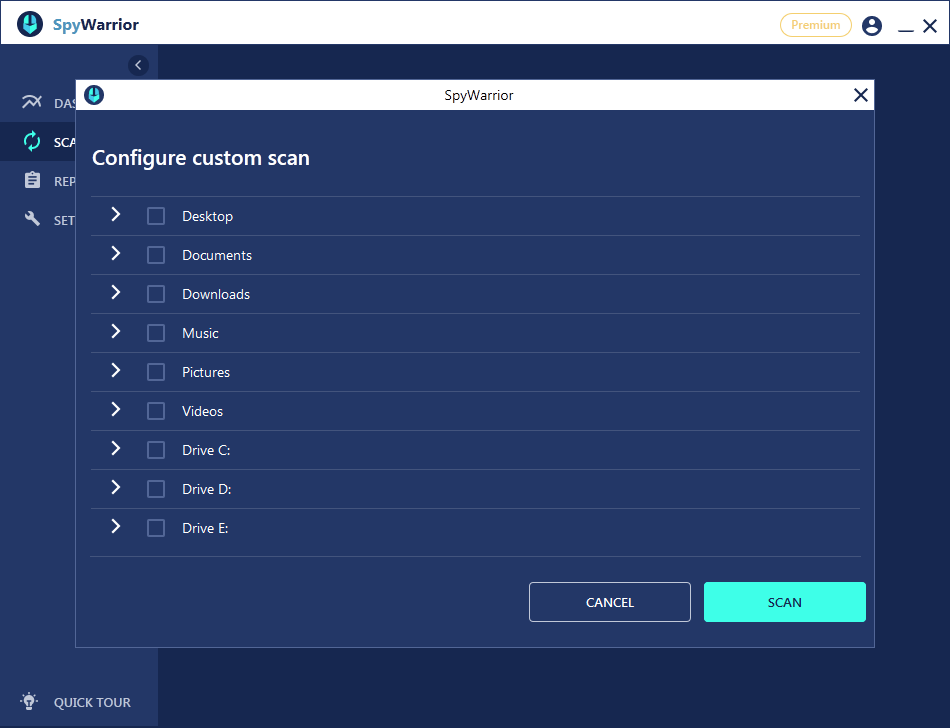
If there is a particular location you wish to scan, click “Start Custom Scan” and check what you want the program to scan. When you check the boxes you want, click “Scan”.
- Checking detected malware
Once a scan finishes, if threats are found on your computer, you will be shown a list. Select the detected issues you wish to remove and click “Delete”.

If you find a program/file you use among those detected as potential issues, check the item and click “Add to Whitelist”. This will prevent SpyWarrior from detecting the same program/file over and over again.

You can manage which files/programs are to be excluded from detection by going to Settings → Exclusions. To delete an item from the whitelist, select it and click “Delete”.

- Changing settings
In Settings → Application, you can change certain settings. We recommend that you keep automatic updates, as well as notifications, turned on so that SpyWarrior is always up to date, can detect new threats, and notify you about detected issues or updates.
We also recommend that you keep the “Launch SpyWarrior when Windows starts” feature turned on.

In Settings → Protection, you can turn on/off real-time and ransomware protection. We recommend that you keep these features turned on.

- Setting up a scan schedule
In Settings → Scan Schedule, you can set up a scan schedule so that you would not need to manually launch scans. To set up a scan schedule, click “Add”.

Select the scan type, frequency, date, and time. Click “Save”. Scheduled scans will begin starting with the date you have set. You can edit/delete schedules however you wish by checking an entry and clicking “Edit” or “Delete”.
- Contacting technical support
If you wish to contact technical support, go to Settings → Help Desk.

Click “New Ticket” and fill in your information. Make sure to accurately select the problem type and provide a detailed explanation for the issue for which you are contacting technical support.

Once you have filled in all the information, click “Submit”. Our technical support will contact you as soon as possible.
Remember, the more details you provide to our technical support, the quicker they can accurately come up with a solution for you.
You can also review all open and closed tickets.

How to activate SpyWarrior’s 7-day free trial
If you wish to try out the program before fully committing, you can do so by using the 7-days free trial. To activate the free SpyWarrior trial, you will need to press Get Premium on either the 1-year plan or 2-year plan on the official website – www.spy-warrior.com/choose-your-plan/
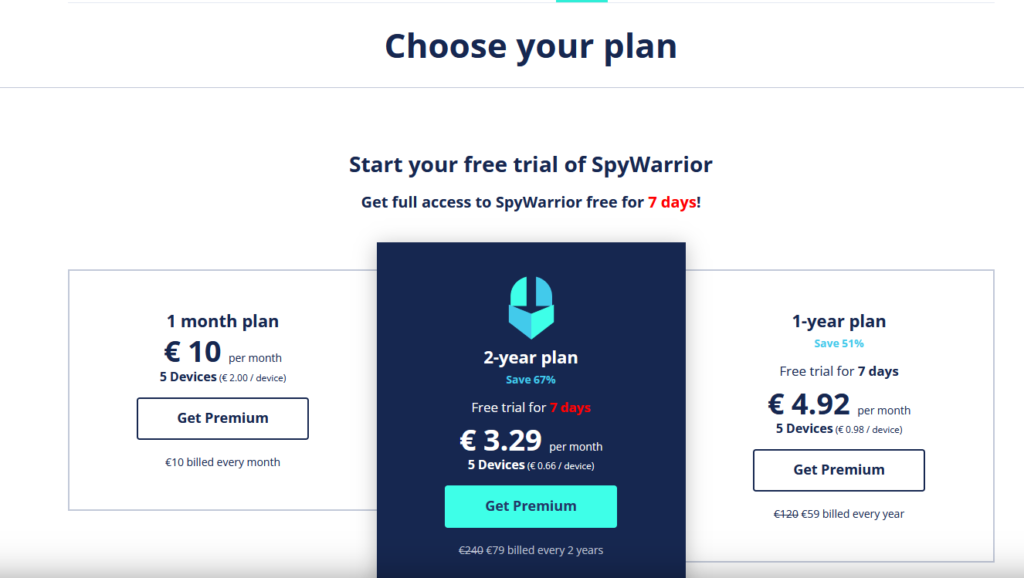
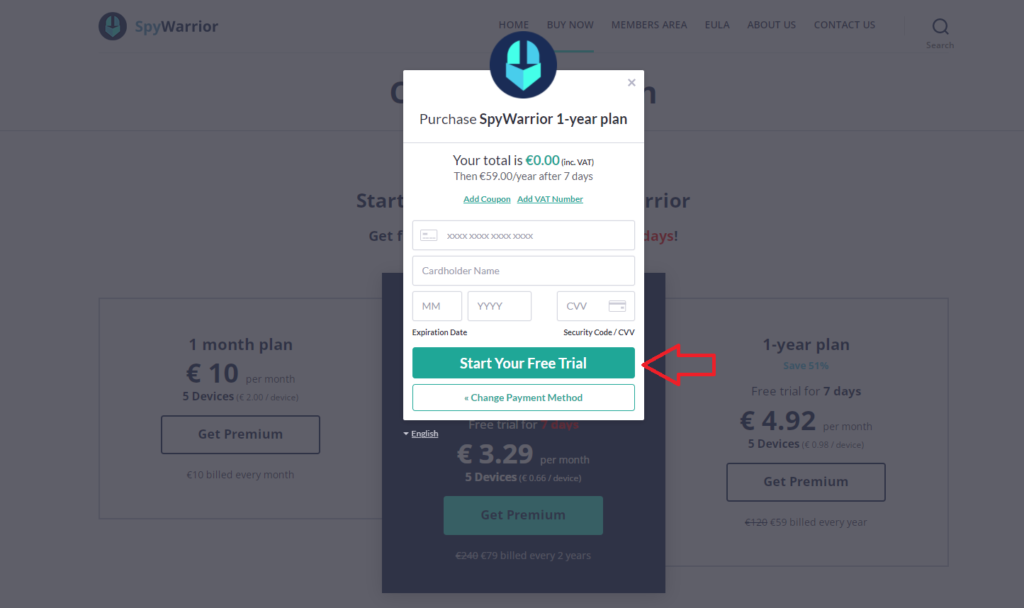
You will be asked to type in your email address, select your location, and either type in your payment card details or proceed with PayPal. You will not be charged until after the 7-day free trial has expired. It should be noted that the 1-month plan does not offer a free trial.
How to activate SpyWarrior
SpyWarrior is a paid program. Therefore, to use the program’s full features, you will need to purchase a subscription. The program will inform you of this when you try to use its premium features. If you try to delete the detected issues while using the free SpyWarrior version, a pop-up window will inform you that you either need to buy a license or activate it.
You already have your license key
If you have already purchased the license, click I Have a License.

Alternatively, you can access the same window by going to Settings → My account.

A new window will ask you to put in your license key, which was shown to you when you purchased the license. Once you have typed in the correct license key, press Activate.

You can also activate the program with your SpyWarrior account credentials instead of the license key. In the SpyWarrior activate license window, press on the toggle switch that says Activate By Email.

This will switch to email activation, and you will be asked to type in your email address and password. The password will have been sent to the email address you provided us when purchasing a subscription. Click Activate to activate your license.
You should now be able to use the program’s full features.
If you purchased the license key but have lost it, you can recover it by clicking Lost license key? in the license activation window.

Clicking Lost license key will take you SpyWarrior’s Members Area on the official website.
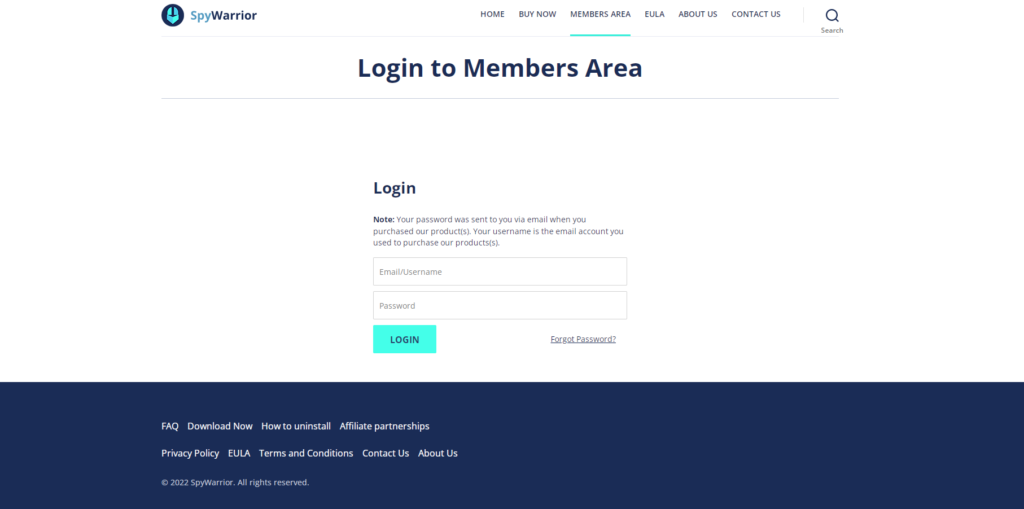
Simply type in your email address and your password (it was sent to your email when you purchased the subscription). Once you have successfully logged in, you will be able to access your License key. Type in the license key in the program’s Activate license window and click Activate. You should now be able to use the program’s full features.
You need to buy the license key
If you do not have a license, click Purchase a License. You can access this window by going to SpyWarrior → Settings → My Account.

When you click Purchase a License, you will be taken to SpyWarrior’s official website where you can choose from three SpyWarrior plans. If you choose the 1-year or 2-years plan, you will automatically be given a 7-day free trial. Once you have completed your purchase, a window with your license key will appear. Open SpyWarrior → Settings → My Account, and type in the license key. Press Activate.

SpyWarrior is now ready to protect your computer.
How to activate SpyWarrior’s 7-day free trial
If you wish to try out the program before fully committing, you can do so by using the 7-days free trial. To activate the free SpyWarrior trial, you will need to press Get Premium on either the 1-year plan or 2-year plan on the official website. You will be asked to type in your email address, select your location, and either type in your payment card details or proceed with PayPal. You will not be charged until after the 7-day free trial has expired. It should be noted that the 1-month plan does not offer a free trial.
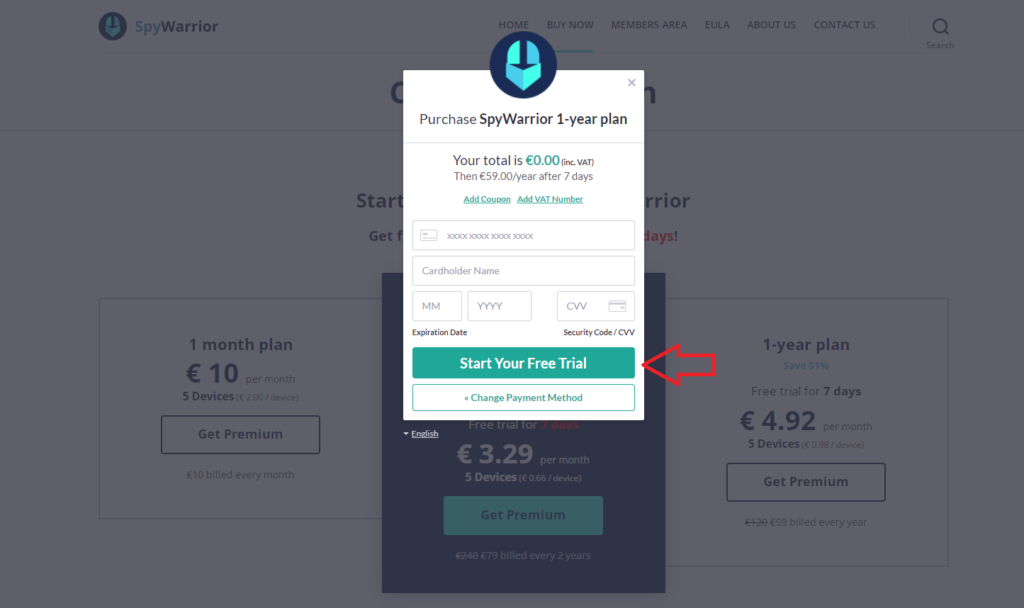
When you click Start Your Free Trial, a window with your license key will pop up. Type in the license key in SpyWarrior to use the program fully. Once the free trial ends, if you have not canceled your subscription, you will automatically be charged for it. You can cancel the subscription at any time by logging in to your account on the official website.
What threats does SpyWarrior detect?
SpyWarrior detects and removes a variety of threats, including adware, browser hijackers, potentially unwanted programs, trojans, viruses, rootkits, ransomware, and other malware.
Why SpyWarrior may not automatically remove certain malware infections?
In some cases, SpyWarrior may not be able to remove a certain malware infection due to its mutation or some other reason. To deal with such issues, you would need to contact SpyWarrior’s technical support, which you can do by filling in a form here.
How can SpyWarrior’s HelpDesk help fight malware?
Using the HelpDesk feature and filling in a ticket, you can send our technical support a diagnostic report for analysis when there is an issue that SpyWarrior is unable to remove automatically. Our tech support, after analyzing the issue, would generate a custom fix specifically tailored to your situation. The custom fix would be delivered to SpyWarrior, and the program would then be able to remove the malicious infection(s) from your computer.
Why is SpyWarrior always detecting cookies?
You may notice that SpyWarrior often shows cookie detections in scan results. Cookies are files that hold information about you but they are mostly harmless. However, for security and privacy reasons, cookies should be deleted regularly. Therefore, SpyWarrior detects and removes them.
Is it necessary to restart the computer after SpyWarrior removes threats?
SpyWarrior will inform you if there is a necessity to restart your computer.
What systems are supported?
SpyWarrior currently only supports Microsoft Windows operating systems. Google Chrome, Mozilla Firefox, Internet Explorer, and Opera browsers are supported.
How can I contact SpyWarrior to provide feedback or report errors?
If you wish to contact SpyWarrior with questions or feedback, or if you want to report an error, you can fill in a form here.
What are SpyWarrior’s minimum system requirements?
Operating Systems Supported
- Microsoft® Windows® 7 (32-bit and 64-bit) Starter/Home Basic/Home Premium/Professional/Ultimate
- Microsoft® Windows® 8, Windows 8.1 and Windows 8 Pro (32-bit and 64-bit)
- Microsoft® Windows® 10 Home/Professional/Enterprise/Education (32-bit and 64-bit)
Minimum Hardware Requirements
- 1 GHz CPU or faster
- 1 GB of RAM
- 200 MB of available hard disk space or more
How to uninstall SpyWarrior
Uninstall SpyWarrior via “SpyWarrior Uninstall”:
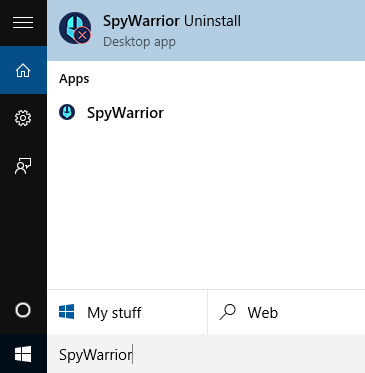
- Open Start menu and type in “SpyWarrior uninstall” in the search box. Click on the “SpyWarrior Uninstall” result.
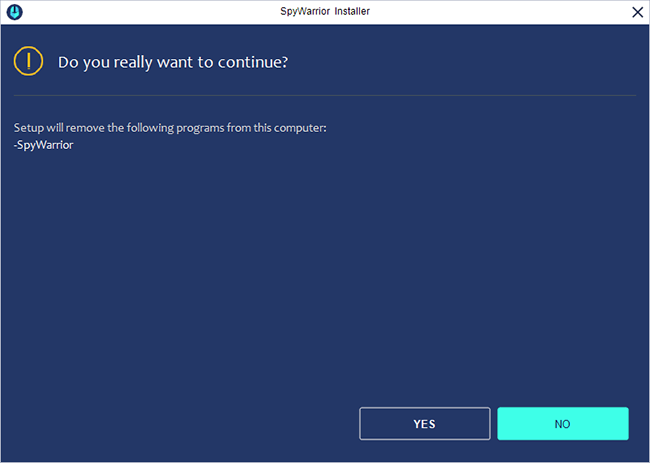
- A SpyWarrior uninstallation window will appear. Click “Yes”. The program will then uninstall.
Uninstall SpyWarrior for Windows 8/8.1/10:
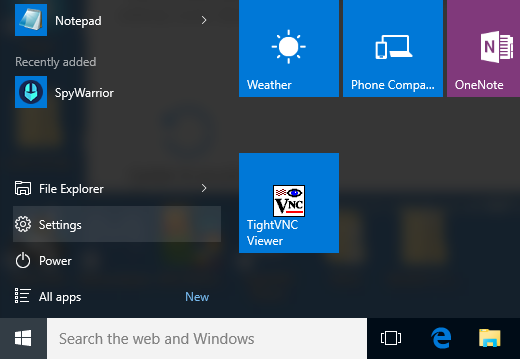
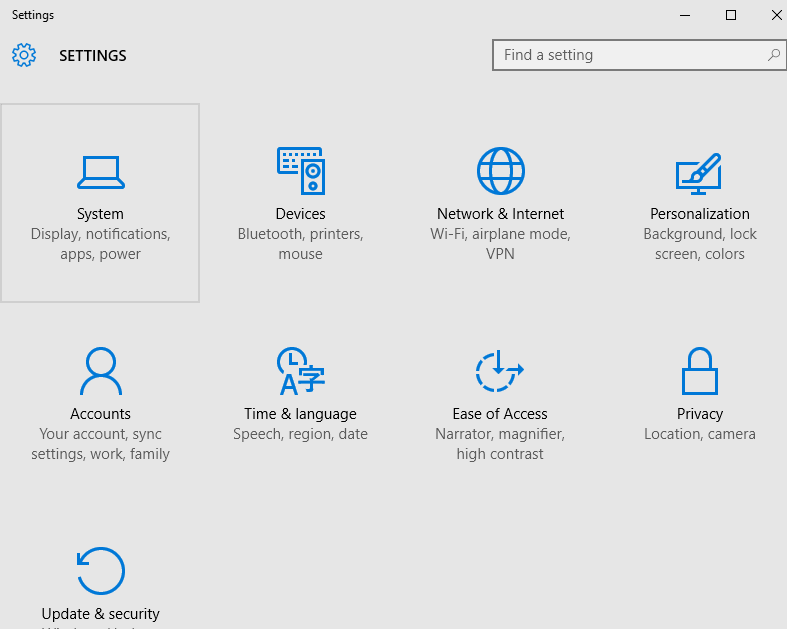
- Open Start menu and click on “Settings”.
- In the “Settings” window, click on “System”.
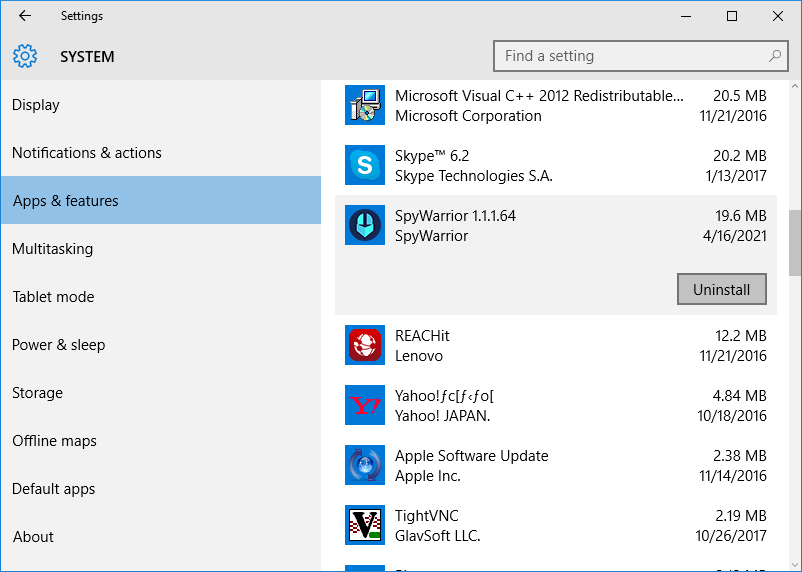
- In the “System” window, click on “Apps & features” located on the left side bar. Find SpyWarrior, click on it and then click “Uninstall”.
Uninstall SpyWarrior for Windows 7/Vista/XP via Control Panel:
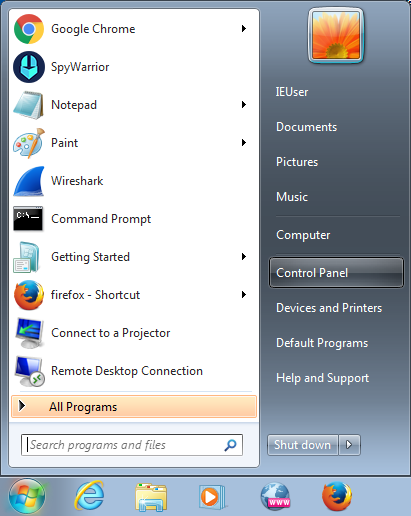
- Open Start menu and select “Control Panel” located on the right side.
- Click on “Uninstall a program” under “Programs”.
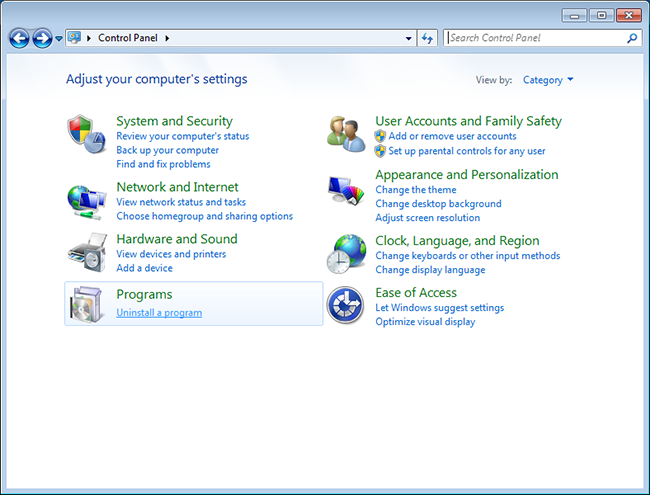
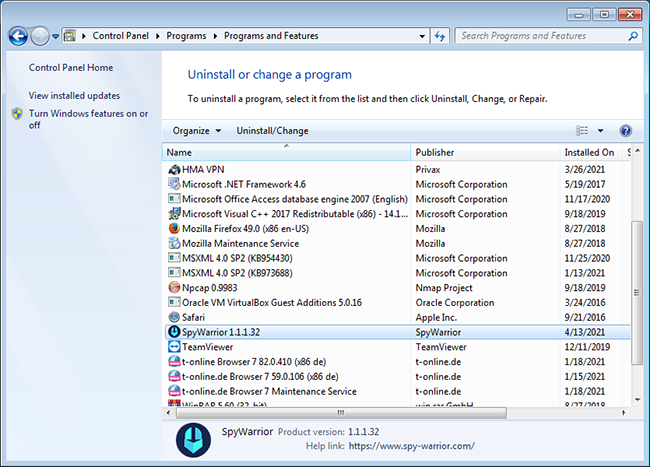
- Find SpyWarrior on the list of installed programs, click on it, and then click “Uninstall”. Alternatively, you can right-click on SpyWarrior and select “Uninstall”. (Administrator privileges may be necessary to uninstall programs).
